Naalbinding – an ancient craft of the Viking era – can of course only be done with one kind of needle: a viking bone needle! In the days of old the viking tradesmen and women travelled the world to vend their wares. Some of them still do, so bone needles are relatively easy to come by. During recent expeditions, we saw vendors offering bone needles in Bork Havn, Ribe and Hedeby/ Haithabu. And more recent we found them at Viking invasion of Teylingen.
So they’re not that hard to find. That said: I am Dutch. And Dutch people don’t easily part with their money. Do you know they ask a whopping € 10 for a bone needle? For a tiny piece of the metatarsus of a cow? It's robbery! Then again, they are Vikings after all... So instead, we bought a piece of bone for a mere € 2. And it's got multiple needles inside! All we need to do is free the needle from excess material.
Here is me, freeing the needle from the bone fragment. I cut a piece of 2-3 mm thick from the bone fragment and cut that diagonally with the jigsaw. The process of sawing in a piece of dead cow produces a very specific and recognizable smell.
I now have to strips of bone that are kind-of needle shaped. There is still some excess material that needs to be removed.
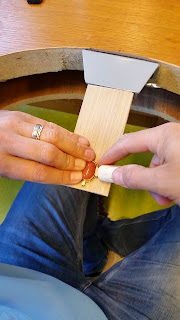
I Flatten the needle with a file.
Drill a hole and elongate it.
Finally some sandpaper to make it smooth.
Now all I need to do is to learn how to bind yarn with the needle.
Extracurricular Activities
dinsdag 20 oktober 2015
zaterdag 13 juni 2015
Flint stone arrowhead pendant
The design of this pendant is 'loosely based on a Chalcedony arrowhead'. The idea came from a visit to the Geologische Museum Hofland.
The idea was to capture a cabochon cut Onyx in an arrow-shaped sterling silver pendant. The Onyx is flanked by two other members of the Chalcedone family, red Carnelians, as a homage to the Chalcedony arrowhead that provided the inspiration for this pendant.
Here is the initial design. well, not the initial-initial design, because the red Carnelians were added only after my initial-initial design was improved by my dearly beloved, artistic, insightful and ever so clever wife.
Here, the design is getting more '3D'. Not by the use of a fancy 3D printer, but by using simple hand tools to form a piece of aluminium wire to fit the design. I really need this to see if a design works, as my visualization skills lack. You can see I wrote down 'Granaat' instead of 'Carnelian'. I could tell you that 'Granaat' is Dutch for 'Carnelian', but it is not. I simply thought all red stones in our stock were Garnet (Granaat) and did not read the label at the bottom of the container...
Here is the Onyx bezel getting shaped in sterling silver. It is a nice job, I like making bezels for stones.
The bezels for the smaller Carnelians proofed to be a pain in the *ss to make. I Also found out the we should have bought other mandrels for making bezels. The tapered ones instead of the stepped ones, as the stepped ones s*ck.
I managed to fabricate the bezel anyway, although it took way too much time. The result justifies the effort in my opinion. Here is the pendant almost finished. The frame and bezels are not soldered together, and the stones are not set yet.
Then, I got really involved in soldering, quenching, pickling, sanding and soldering, quenching, pickling, sanding, sanding and polishing so I have no more pictures from the intermediate stages. Which is rather convenient, because I managed to disintegrate the smaller one of the Carnelians in the process. Fortunately, we had another one in stock So Fast-Forward to the final result: My arrowhead pendant, perched on another Chalcedony mineral!
This pendant is for sale in our webshop.
dinsdag 2 juni 2015
More Power (and lower oxygen bill)
 I Decided that I need more power for soldering, and at the same time reduce my oxygen bill.
I Will describe what I did, but bear in mind that working with flammable gases is dangerous, so you must not try to duplicate my build. As I am quite frugal, I am looking at a cost effective solution. So I would like to have a burner that uses the same gas cylinder that my Little Torch uses: 600ml Supergas gaspatroon 7/16"
 I Use a thread die to create 4 x 0.75mm thread on the brass tubing and make a hose pillar of the opposite side of the tube, that will later connect to the hose. I attach a copper wire around the tube with some silver solder. That ring will hold the hose in place. I solder another such ring around the threaded end of the tube. This ring will compress the rubber O-ring against the burner head, sealing the tube.The tube screws into the burner head with teflon tape and the o-ring to make the connection gas tight.I Use a piece of willow, left over from a hiking stick project, to make a wooden handle and connect the hose to the brass hose pillar using a hose clamp.
The result looks like this. It is now ready to be leak-checked (outside) and tested!The result looks like this. It is now ready to be leak-checked (outside) and tested!The result looks like this. It is now ready to be leak-checked (outside) and tested!Remember: DO NOT TRY THIS AT HOME!
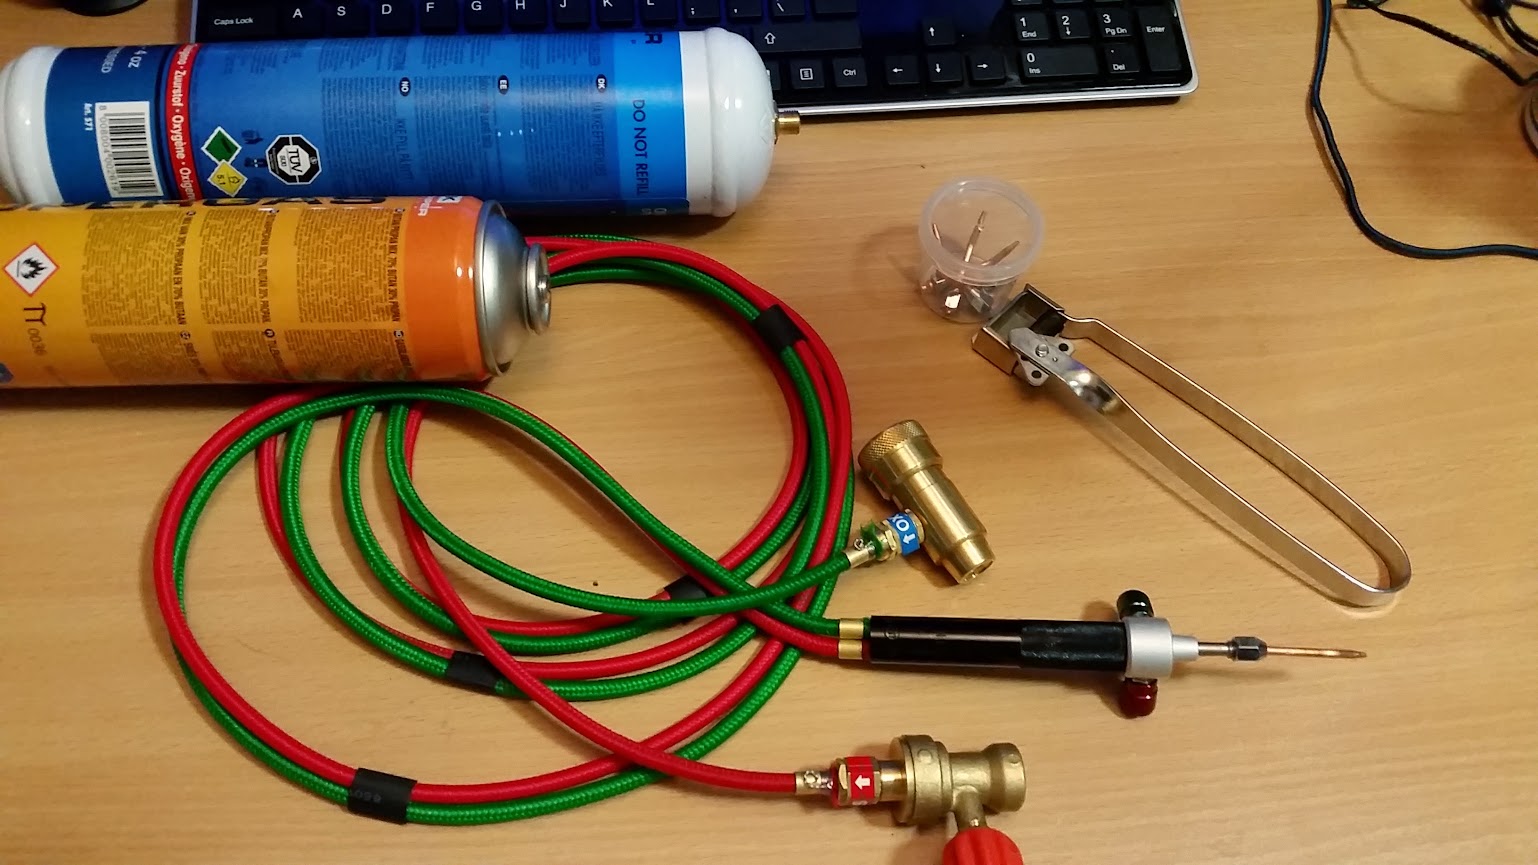
I Will only use the 5/16" coupling and valve, and discard the rest. The supplied hose is a bit short, so I also order this 180cm braided pneumatic hose. But enough about the cost. Time to do some building!
The hose comes with two couplings that I cut off. It connects to the 5/16" valve in the same way as the original hose.
Now I make 4mm threat in the burner inlet. I Use a 4 x 0.75mm threat tap to do that, m aking sure no debris enters the burner head as that will render the valve inoperative.
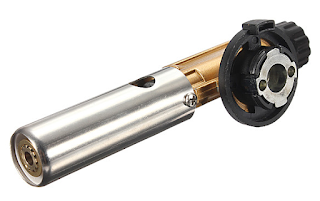
I Found a very cheap burner on Aliexpress that connects directly to a butane cylinder. I Could just buy this one and use it as is, but where is the fun in that? It also would be very bulky and not use the same cylinder as my LT.
But the burner is very usable, made of metal (not brass as you would expect from the picture, but some kind of undetermined alloy), it has an igniter and can be connected to a standard butane gas cylinder without additional pressure regulator.
So to connect it to a 5/16" gas canister, you need valve with the right coupling. Fortunately, Aliexpress sells just what I need. A hose with this coupling, and another coupling to connect it to a 'normal' butane cylinder. This hose is normally used to fill the smaller canisters from a larger one.

This hose is 4mm internal and 6mm external with a nylon sheath and has a maximum pressure of 5.5 Bar. Butane gas cylinders have a maximum pressure of 4 Bar at 50°C. So the hose is sufficiently strong for the expected maximum gas pressure. It is similar in build as the hoses that connect to the Smith Little Torch and allow plenty of freedom of movement.
I Found a piece of 4mm brass tubing and wood for the handle.
The burner, valve and hose cost me a total of US$ 23 (about €20).
The disposable gas cylinder with 7/16" coupling costs another €5, so that brings the total cost up to €25.
The burner, valve and hose cost me a total of US$ 23 (about €20).
The disposable gas cylinder with 7/16" coupling costs another €5, so that brings the total cost up to €25.
The burner needs some rework in order to connect it to the hose.

maandag 11 mei 2015
Goldstone Squirrel Pendant
For this pendant, I choose a cabochon goldstone. The funny thing about this semiprecious stone is that it is not a natural stone at all. In fact, it is a piece of glittering glass. The glittering is caused by encapsulated pieces of copper. Hence the choice to make a copper and brass setting.
Despite the synthetic nature of the goldstone, it has some remarkable properties. Goldstone helps the wearer to stay calm and stabilize his or her emotions. It helps to attain one's goals. It can be used as an energy generator and can deflect unwanted energies, making it used as a protection stone. So maybe it was not me choosing the goldstone, but the goldstone choosing me.
The brass is rolled to the correct thickness. 0.7mm for the back plate end 0.3mm for the bezel. Wish I had one of those rolling mills myself, but that will have to wait until I am rich and famous. So that will be at least 3 weeks from now.
I cut a squirrel into the back plate. It only takes me 4 saw blades to do that.
The bezel is soldered to fit the stone and turned out to be just a bit too large. So I get to do it all again, jay! The yellow solder does not flow as easy as silver solder I just learn.
Soldering the bezel to the back also took some effort, but I manage finally.
Next comes the design for the eyelet.
I Finally settle on a more classic design with twisted copper wire around the circumference of the bezel. After some more soldering, cleaning and sanding, the setting is ready to be 'set'.
For this purpose, I made a brass bezel rocker tool with a willow handle.
With a secret squirrel at the back, that the wearer will see each time she puts the necklace around her neck.
Goldsmith Yolanda Nieuwboer of Golden Art Design graciously made these glamour pictures of my pendant:
Thanks!
This pendant is now featured in our portfolio.
Despite the synthetic nature of the goldstone, it has some remarkable properties. Goldstone helps the wearer to stay calm and stabilize his or her emotions. It helps to attain one's goals. It can be used as an energy generator and can deflect unwanted energies, making it used as a protection stone. So maybe it was not me choosing the goldstone, but the goldstone choosing me.
The brass is rolled to the correct thickness. 0.7mm for the back plate end 0.3mm for the bezel. Wish I had one of those rolling mills myself, but that will have to wait until I am rich and famous. So that will be at least 3 weeks from now.
I cut a squirrel into the back plate. It only takes me 4 saw blades to do that.
The bezel is soldered to fit the stone and turned out to be just a bit too large. So I get to do it all again, jay! The yellow solder does not flow as easy as silver solder I just learn.
Soldering the bezel to the back also took some effort, but I manage finally.
Next comes the design for the eyelet.
For this purpose, I made a brass bezel rocker tool with a willow handle.
The bezel is made to shine using an Agate stone burnisher.
And here it is, the finished product.
With a secret squirrel at the back, that the wearer will see each time she puts the necklace around her neck.
Goldsmith Yolanda Nieuwboer of Golden Art Design graciously made these glamour pictures of my pendant:
Thanks!
This pendant is now featured in our portfolio.
zondag 5 april 2015
Reticulating Silver
After reading about a metalworking process called Reticulation in John Sartin's Complete Guide To Making Metal Jewelry, and reading the almost sexual experience of Kaelin Cordis in Reticulating Metals or Riding the Ragged Edge of Disaster… I just had to try this technique.
Fortunately, the required metal was on hand, and even the granulate for supporting the sheet during heating was graciously arranged for me in class. As well as a warning that reticulation is a wildly unpredictable technique and I could end up with either a fabulous piece, or a blob of molten metal.
The 835/165 silver was a bit thicker than I needed, so the process started with me learning how to operate a rolling mill. After rolling to 0.8mm thickness, the metal is warped but I decide to not straighten it as it will add to the rough appearance of the reticulated silver. The process starts with a boring sequence of heating, quenching and pickling repeated 4 or 5 times. This forms a layer of fine silver on top of the inner layer of 835/165 silver.
This is me turning up the heat on the unsuspecting silver. The object is to melt the core material of the sheet, without melting or burning the surface layer of fine silver.
The 'without burning' part was a bit harder than I first thought. Must be my (lack of) skills :D
I Hand-form a bezel of Sterling silver that will be the outer rim of the pendant-to-be.
The reticulated sheet is then made to snugly fit the bezel.
More heat. Now the sheet is soldered to the bezel. Time to play with my new toy!
No time to take photographs of the Little Tolch (Chinese version of the Smith Little Torch) in action as I am nervous as hell that the whole thing will turn into a blob on me. In preparation for the tarnishing the pendant is heated, quenched an pickled a couple of times more. I Use the softer flame of he butane torch for this. A lot better for the nerves and the oxygen bill!
At this time, the location for the eyelet for the chain is determined for me by my lovely wive, who has a far better eye for these kind of details than I do.
The pendant and one of the twisted wire rings is tarnished with Liver of Sulphur and then polished in appropriate places with a miracle-cloth.
As a final touch, the peaks on the pendant are made to shine using an Agate Burnishing tool.
This pendant is now featured in our portfolio.
Abonneren op:
Posts (Atom)


